Web Components
Web Components allow you to embed epilot Journeys directly into your website as native custom HTML elements. Unlike iframes, Web Components run within the page itself using the Shadow DOM, which keeps styles and scripts encapsulated while offering faster performance, better accessibility, and tighter integration with your host application.
Why Web Components over iframes?
- Performance — no iframe overhead; the Journey renders directly in your page.
- Integration — communicate with the Journey through standard HTML attributes instead of cross-frame messaging.
- Accessibility — screen readers and keyboard navigation work seamlessly.
- Style encapsulation — Shadow DOM prevents style collisions in both directions, with optional inheritance.
Quick Start
1. Add the embed script
Place the following script tag in your page, preferably within the <head> section:
<script
  src="https://journey.epilot.io/stable/assets/embed.js"
  type="module"
  async
></script>
For Canary updates, use the canary script
<script
  src="https://journey.epilot.io/canary/assets/embed.js"
  type="module"
  async
></script>
Loading the script with async ensures it downloads without blocking your page and executes as soon as it's available. The script auto-registers the <epilot-journey> custom element on load.
2. Add the Journey element
Place the <epilot-journey> custom element wherever you want the Journey to appear:
<epilot-journey
  journey-id="<your-journey-id>"
  mode="inline"
  lang="de"
  top-bar="true"
></epilot-journey>
Replace <your-journey-id> with the ID of the Journey you want to embed.
3. You're all set
The Journey will render inline on your page. Read on for the full attribute reference and advanced configuration options.
Attribute Reference
All attributes are set as standard HTML attributes on the <epilot-journey> element. Boolean attributes accept "true" or "false" as string values.
| Attribute | Type | Default | Description |
|---|---|---|---|
journey-id | string | — | Required. The ID of the Journey to render. |
mode | "inline" | "full-screen" | "full-screen" | The display mode. inline renders the Journey within the page flow. full-screen renders it as an overlay. |
lang | "de" | "en" | "fr" | "de" | Overrides the UI language. This affects UI labels and copy, but does not automatically translate static content configured in the Journey Builder. |
top-bar | "true" | "false" | "true" | Whether to show the top navigation bar. Only applies in inline mode — in full-screen mode the top bar is always visible and cannot be hidden. |
scroll-to-top | "true" | "false" | "true" | Whether to scroll the page to the top of the Journey when the user navigates to a new step. |
close-button | "true" | "false" | "true" | Whether to show the close button in the top bar. |
context-data | JSON string | — | Additional contextual data passed to the Journey and included with the submission. Must be a JSON-encoded string of key-value pairs. See Context Data. |
data-injection-options | JSON string | — | Pre-fill Journey fields and control the starting step. Must be a JSON-encoded string. See Data Injection. |
journey-token | string | — | A JWT token used for post-qualification Journeys. |
as-organization-id | string | — | Organization ID to use as the Journey's organization context. Sent as the x-epilot-org-id header on entity requests. Useful in partner / shared-entities scenarios where the Journey needs to access data owned by a different organization. |
is-full-screen-entered | "true" | "false" | "false" | Controls whether a full-screen Journey is visible. Set to "true" to open it. Only applies when mode is "full-screen". |
is-embedded | "true" | "false" | "false" | Indicates the Journey is embedded on a host app. |
debug | "true" | "false" | "false" | Enables debug mode for development and troubleshooting. |
Accessible name
The standard HTML title attribute works on <epilot-journey> and is exposed to screen readers. If you embed via the Journey Embed SDK, use .name(value) — it sets title on the element for you.
Examples
Inline Mode
Render the Journey directly within the page flow:
<epilot-journey
  journey-id="<your-journey-id>"
  mode="inline"
  lang="de"
  top-bar="true"
  scroll-to-top="true"
></epilot-journey>
Full-Screen Mode
In full-screen mode, the Journey is hidden by default. Use the is-full-screen-entered attribute to control its visibility:
Top bar in full-screen
The top bar is always visible in full-screen mode and cannot be hidden. The top-bar attribute is ignored when mode is "full-screen". The close button inside the top bar can still be toggled with the close-button attribute.
<epilot-journey
  journey-id="<your-journey-id>"
  mode="full-screen"
  lang="en"
  top-bar="true"
  close-button="true"
></epilot-journey>

<button onclick="openJourney()">Open Journey</button>

<script>
  function openJourney() {
    const el = document.querySelector('epilot-journey')
    el.setAttribute('is-full-screen-entered', 'true')
  }
</script>
To close the Journey, set the attribute back to "false":
document
  .querySelector('epilot-journey')
  .setAttribute('is-full-screen-entered', 'false')
Live Examples
Browse interactive, runnable examples for every embedding scenario:
- Web Component Storybook — inline, full-screen, inline-to-fullscreen, launcher, data injection, and more.
- SDK Storybook — the same scenarios using the JavaScript SDK with both iframe and web component backends.
Use the Controls panel in Storybook to change attributes in real time. These examples work with public Journeys only — enter your own journey-id in the controls to see it in action.
Context Data
Use the context-data attribute to pass additional key-value pairs to the Journey. This data is included with the submission and can be used for tracking, attribution, or pre-configuring behavior.
The value must be a JSON-encoded string. Only string and numeric values are supported:
<epilot-journey
  journey-id="<your-journey-id>"
  mode="inline"
  context-data='{"source": "landing-page", "campaign": "summer-2025", "count": 3}'
></epilot-journey>
Numeric values are coerced to strings internally.
The Journey also automatically picks up URL search query parameters from the host page and includes them as context data. For example, if the page URL is https://example.com/energy?utm_source=google&campaign=summer, the utm_source and campaign values will be included in the context data automatically. Values passed explicitly via the context-data attribute take precedence over query parameters when keys overlap.
Data Injection
Data injection allows you to pre-fill Journey fields with data and optionally start from a specific step. This is useful when your website has already collected some information (e.g. a product selection or address) and you want to carry it into the Journey.
- Prefill data — set initial values for journey blocks.
- Start from a specific step — skip earlier steps (e.g., when product selection happens on an external website).
- Control field display — disable specific fields.
The data-injection-options attribute accepts a JSON string with the following structure:
type DataInjectionOptions = {
  /** The stable id of the step to start the Journey from (recommended) */
  initialStepId?: string
  /**
   * The step index to start the Journey from (0-based).
   * @deprecated Legacy alternative to initialStepId; the index shifts when steps are reordered
   */
  initialStepIndex?: number
  /**
   * Pre-fill data. Two forms are supported:
   * - recommended: an object keyed by stable block id -> block value
   * - deprecated (legacy): an array indexed by step position, each entry keyed by block name
   */
  initialState?:
    | Record<string, Record<string, unknown>>
    | Record<string, unknown>[]
  /**
   * Control which blocks are disabled (rendered read-only). Read-only is
   * currently supported only for these block types: Personal Information,
   * Address, Availability Check, and Text Input.
   */
  blocksDisplaySettings?: BlockDisplaySetting[]
}

type BlockDisplaySetting = {
  type: 'DISABLED'
  /** The stable, journey-wide id of the block to target (recommended) */
  blockId?: string
  /** @deprecated Legacy alternative to blockId; breaks silently when the block is renamed */
  blockName?: string
  /** @deprecated Legacy alternative to blockId; the 0-based step index shifts when steps are reordered */
  stepIndex?: number
  blockFields?: string[]
}
Setting data injection options
The recommended form keys initialState by block ID — the block's stable, journey-wide identifier. Block IDs are unique across the whole Journey and are unaffected by block renames or by reordering steps, so an embed keyed by block ID keeps working even after the Journey is restructured.
Pass the JSON directly as a string attribute using single quotes around the attribute value. The complete example below starts the Journey at a step by its stable initialStepId, prefills a block by id via initialState, and disables that block's field by blockId:
<epilot-journey
  journey-id="<your-journey-id>"
  mode="inline"
  data-injection-options='{"initialStepId":"f0e1d2c3-b4a5-6789-0abc-def012345678","initialState":{"b1f2c3d4-5e6f-7a8b-9c0d-1e2f3a4b5c6d":{"city":"Berlin"}},"blocksDisplaySettings":[{"type":"DISABLED","blockId":"b1f2c3d4-5e6f-7a8b-9c0d-1e2f3a4b5c6d","blockFields":["city"]}]}'
></epilot-journey>
You can also set it dynamically via JavaScript, building the same options with JSON.stringify:
const el = document.querySelector('epilot-journey')

el.setAttribute(
  'data-injection-options',
  JSON.stringify({
    initialStepId: 'f0e1d2c3-b4a5-6789-0abc-def012345678',
    initialState: {
      'b1f2c3d4-5e6f-7a8b-9c0d-1e2f3a4b5c6d': { city: 'Berlin' },
    },
    blocksDisplaySettings: [
      {
        type: 'DISABLED',
        blockId: 'b1f2c3d4-5e6f-7a8b-9c0d-1e2f3a4b5c6d',
        blockFields: ['city'],
      },
    ],
  })
)
Populating initialState
The recommended form keys initialState by block ID. Each entry is an object of the field values for that block. Because the state is keyed by block ID, you only list the blocks you actually want to prefill — no per-step ordering or empty {} placeholders are needed, and the mapping is unaffected by block renames or step reordering.
Making blocks read-only
blocksDisplaySettings renders a block — or specific fields within it — as read-only: the prefilled values are shown but the end customer can't edit them. Each entry sets type: 'DISABLED' and targets a block by its stable blockId (recommended); add blockFields to lock only certain fields instead of the whole block.
Read-only is currently supported only for these block types:
- Personal Information
- Address
- Availability Check
- Text Input
Other block types don't support read-only.
Data Injection builder (preview)
You don't have to hand-write block IDs. The Journey Builder includes a Data Injection (preview) tool that lets you build the configuration visually: pick the blocks and fields to prefill, set their pre-fill values, mark blocks as read-only, choose the starting step, then copy the generated data-injection-options snippet straight onto your <epilot-journey> element.

Legacy step-index form (deprecated)
initialState also accepts an array form (one entry per step indexed by step position, keyed by block name, with empty {} objects for steps you don't prefill), and blocksDisplaySettings also accepts the blockName + stepIndex pair. Both legacy forms are deprecated but still supported for backward compatibility; they break silently when blocks are renamed or steps are reordered, so prefer the block-ID form for new integrations.
el.setAttribute(
  'data-injection-options',
  JSON.stringify({
    initialStepIndex: 1,
    initialState: [
      {},
      {
        'Product Selection': {
          selectedProduct: 'solar-panel-basic',
          _isValid: true,
        },
      },
    ],
    blocksDisplaySettings: [
      {
        type: 'DISABLED',
        blockName: 'Product Selection',
        stepIndex: 1,
        blockFields: ['selectedProduct'],
      },
    ],
  })
)
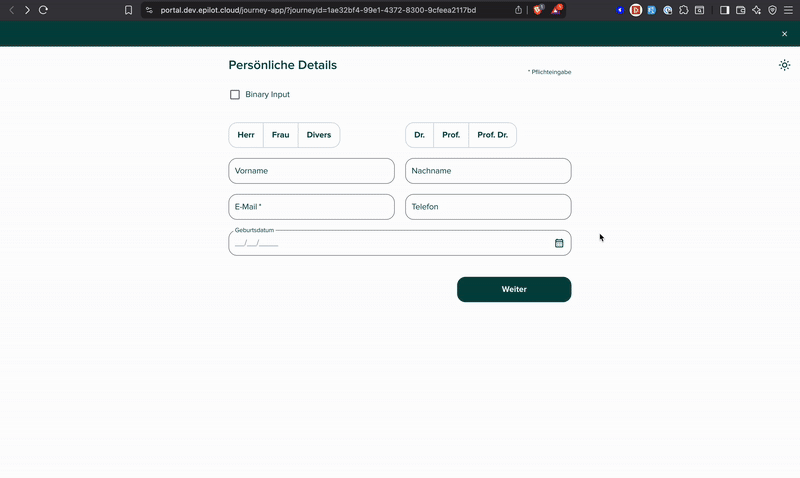
Open your Journey in debug mode from the Journey Builder and inspect the state for each step. See below:
Dynamic Attribute Updates
The <epilot-journey> element reacts to attribute changes. You can update attributes dynamically via JavaScript, and the Journey will re-render with the new configuration:
const journey = document.querySelector('epilot-journey')

// Change language
journey.setAttribute('lang', 'en')

// Update context data
journey.setAttribute('context-data', JSON.stringify({ source: 'checkout' }))
You can also call the refresh() method on the element to force a re-render:
document.querySelector('epilot-journey').refresh()
Events
The <epilot-journey> Web Component dispatches custom events on the window object that you can listen for. The event names are the same as the iframe postMessage events used by the iframe embed script, so you can use the same event names regardless of the embedding method.
Event Reference
| Event | Description |
|---|---|
EPILOT/JOURNEY_LOADED | The Journey has finished loading. |
EPILOT/EXIT_FULLSCREEN | The Journey exited full-screen mode. |
EPILOT/ENTER_FULLSCREEN | The Journey entered full-screen mode. |
EPILOT/CLOSE_JOURNEY | The user closed the Journey. |
EPILOT/FORM_EVENT | A form-level event occurred (e.g. submission). |
EPILOT/USER_EVENT/PAGE_VIEW | The user navigated to a new step. |
EPILOT/USER_EVENT/PROGRESS | The user made progress in the Journey. |
ExitFullScreen | Legacy event for exiting full-screen mode. |
Listening for Events
// React when the journey finishes loading
window.addEventListener('EPILOT/JOURNEY_LOADED', () => {
  console.log('Journey has loaded!')
})

// React when the user navigates to a new step
window.addEventListener('EPILOT/USER_EVENT/PAGE_VIEW', (event) => {
  console.log('User navigated to a new step', event.detail)
})
Example: Showing a Skeleton Loader
A common use case is to display a loading skeleton while the Journey loads, then reveal the Journey once it's ready. You can listen for the EPILOT/USER_EVENT/PAGE_VIEW event (for inline mode) or EPILOT/JOURNEY_LOADED (for full-screen mode) to know when the Journey is ready to be shown.
<!-- Skeleton placeholder -->
<div id="journey-skeleton" style="padding: 20px; max-width: 800px;">
  <div
    style="height: 24px; width: 60%; background: #e0e0e0; border-radius: 4px; margin-bottom: 16px;"
  ></div>
  <div
    style="height: 16px; width: 80%; background: #e0e0e0; border-radius: 4px; margin-bottom: 12px;"
  ></div>
  <div
    style="height: 16px; width: 70%; background: #e0e0e0; border-radius: 4px; margin-bottom: 12px;"
  ></div>
  <div
    style="height: 40px; width: 100%; background: #e0e0e0; border-radius: 4px;"
  ></div>
</div>

<!-- Journey (hidden initially) -->
<epilot-journey
  id="my-journey"
  journey-id="<your-journey-id>"
  mode="inline"
  lang="de"
  style="opacity: 0; height: 0; display: block; transition: opacity 0.3s ease-in;"
></epilot-journey>

<script>
  window.addEventListener('EPILOT/USER_EVENT/PAGE_VIEW', function onLoad() {
    const skeleton = document.getElementById('journey-skeleton')
    const journey = document.getElementById('my-journey')

    // Fade out skeleton and reveal the journey
    skeleton.style.display = 'none'
    journey.style.height = ''
    journey.style.opacity = '1'

    // Clean up — only need to handle this once
    window.removeEventListener('EPILOT/USER_EVENT/PAGE_VIEW', onLoad)
  })
</script>
Limitations
Single instance per page
Only one <epilot-journey> element is supported per page. Placing multiple instances on the same page is not supported and may lead to unexpected behavior.
To load a different Journey, update the attributes on the existing element rather than adding a new one:
<epilot-journey
  journey-id="<journey-id-1>"
  mode="inline"
  lang="de"
></epilot-journey>

<button onclick="switchJourney()">Load another Journey</button>

<script>
  function switchJourney() {
    const el = document.querySelector('epilot-journey')
    el.setAttribute('journey-id', '<journey-id-2>')
    el.setAttribute('lang', 'en')
  }
</script>
If you need multiple Journeys visible simultaneously, use the iframe embedding approach instead.
Content-Security-Policy (CSP)
If you don't have Content-Security-Policy defined for your pages, you can skip this. If you have but can temporarily disable to perform the this test, go for that. Otherwise, please ensure you update your policy to allow the below
  script-src https://journey.epilot.io;
  style-src  'unsafe-inline' https://journey.epilot.io https://fonts.googleapis.com;
  img-src    data: blob: https://file.sls.epilot.io https://file-preview.sls.epilot.io https://journey.epilot.io;
  font-src   data: https://journey.epilot.io https://fonts.gstatic.com;
  connect-src 'self' https://*.sls.epilot.io https://*.epilot.io https://portal.epilot.cloud https://epilot-dev-user-content.s3.eu-central-1.amazonaws.com;
  frame-src  https://journey.epilot.io https://portal.epilot.cloud;
  form-action https://submission.sls.epilot.io https://journey.epilot.io;
tip
These rules are subject to change as we're rolling out new features and web components themselves. Depending on your Journey setups, you might also need to give additional permissions in case you're using third-party apps or apps of your own.
See the dedicated Content-Security-Policy page for additional guidance on nonces and inline script handling.
Migrating from iframes
If you are currently embedding Journeys using iframes with the __epilot embed script, migrating to Web Components involves:
Replace the embed script — swap the iframe bundle script for the Web Component embed script:
- <script src="https://embed.journey.epilot.io/bundle.js"></script>
+ <script src="https://journey.epilot.io/stable/assets/embed.js" type="module" async></script>Replace the initialization code — instead of calling
__epilot.init(), use the<epilot-journey>custom element directly:- <div id="epilot-journey-<id>" style="width:100%;text-align:left"></div>
- <script>
- __epilot.init([{
- journeyId: '<id>',
- mode: 'inline',
- topBar: true,
- lang: 'de',
- }])
- </script>
+ <epilot-journey
+ journey-id="<id>"
+ mode="inline"
+ top-bar="true"
+ lang="de"
+ ></epilot-journey>Migrate event listeners — replace
__epilot.on()calls with standardwindow.addEventListener(). The event names are the same as the iframe postMessage events, so no renaming is needed. See the Events section for the full list.Update CSP rules — the same epilot domain rules apply. See Content-Security-Policy.
The attribute names on the Web Component map directly to the options you previously passed to __epilot.init(), converted to kebab-case (e.g. topBar becomes top-bar, scrollToTop becomes scroll-to-top).
Changelog
2026-06-11
- Data injection now documents stable block IDs as the recommended form:
initialStateis keyed by block ID,initialStepIdselects the starting step, andblocksDisplaySettingstargets blocks byblockId. Block IDs are unique journey-wide and resilient to block renames and step reordering. The legacy step-index + block-name forms remain supported but are deprecated.